
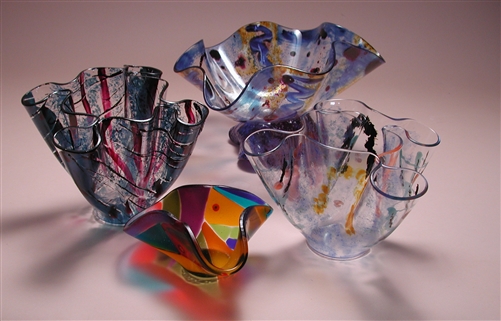
Glass slumping is a fascinating and intricate craft that involves shaping glass over molds at high temperatures to create beautiful and functional art pieces. For those looking to refine their techniques and achieve stunning results, understanding the nuances of the process is essential. Mastering the craft of glass slumping requires patience, precision, and a keen eye for detail. This guide offers insights into perfecting this art form, providing tips for both beginners and seasoned artisans alike.
Understanding the Basics of Glass Slumping
Before diving into advanced techniques, it’s crucial to grasp the foundational principles of glass slumping. This process involves heating glass in a kiln until it becomes pliable enough to conform to the shape of a mold. The key factors to consider include:
- Temperature Control: Precise temperature management is vital to avoid over-slumping or under-slumping, which can compromise the integrity and appearance of the glass.
- Mold Selection: Choosing the right mold is critical. Different shapes and materials will affect the slumping process and the final outcome.
- Glass Compatibility: Ensure that the glass types used are compatible in terms of expansion rates to prevent cracking or stress.
For more detailed information on these foundational aspects, find out more about this approach.
Advanced Techniques for Successful Glass Slumping
Once the basics are mastered, exploring advanced techniques can elevate one’s glass slumping projects. Consider the following strategies:
Experimenting with Layering
Layering different colors and types of glass can create visually striking effects and add depth to the piece. However, it’s crucial to:
- Test Compatibility: Use test pieces to ensure the different glass types will meld well without causing defects.
- Adjust Firing Schedules: Modify kiln schedules to accommodate the additional layers and prevent bubbles.
Interested artisans can explore advanced guides and tips on layering techniques.
Utilizing Textures and Patterns
Incorporating textures and patterns into glass slumping projects can add uniqueness and appeal. This can be achieved by:
- Using Textured Molds: Select molds with intricate designs to imprint on the glass surface.
- Applying Resist Materials: Materials like sand or refractory papers can be used to create patterns.
To delve deeper into these techniques, discover expert strategies here.
Common Challenges and Solutions
Even experienced glass artists encounter challenges during slumping. Understanding common issues and their solutions can save time and materials.
Avoiding Thermal Shock
Thermal shock occurs when glass is subjected to rapid temperature changes, leading to cracks. To prevent this:
- Gradual Heating and Cooling: Implement slow heating and cooling cycles to minimize stress.
- Use a Digital Controller: A digital kiln controller can precisely manage temperature changes.
For more insights, learn about our tailored solutions.
Dealing with Bubbles
Bubbles can mar the appearance of a glass piece. To reduce their occurrence:
- Properly Clean Glass: Ensure all glass surfaces are free of contaminants before firing.
- Adjust Kiln Schedules: Longer soak times at lower temperatures can help bubbles escape.
For comprehensive strategies to tackle this issue, explore advanced guides and tips.
Conclusion
Mastering the craft of glass slumping requires a balance of artistry and technical skill. By understanding the fundamentals, experimenting with advanced techniques, and addressing common challenges, artisans can create exquisite pieces that reflect their creativity and expertise. For those eager to deepen their knowledge and refine their skills, find out more about this approach to elevate your glass slumping projects.